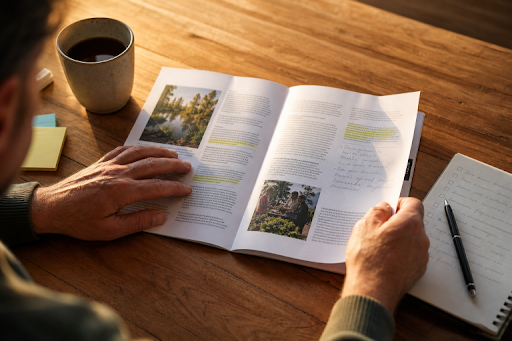
A printed guide can still be one of the most useful tools for an event, training session, classroom, visitor center, community program, or product introduction. Unlike a webpage that competes with notifications and open tabs, a well-planned guide gives readers a focused reference they can carry, mark up, and return to when they need an answer.
Planning should happen before design files are built or booklet printing turnaround options are considered. The strongest guides are not simply attractive collections of pages. They are practical tools that help a specific person complete a task, understand a process, or make a decision with less confusion.
Why Printed Guides Still Have A Useful Role
Print is especially helpful when people need to follow steps, compare choices, find locations, take notes, or refer to the same information more than once. A website may be better for frequent updates, while a slideshow may work for a live presentation. A guide works best when readers need a reliable, self-contained resource in front of them.
Good page structure also makes complicated material feel manageable. The principles of presenting information for efficient understanding apply to every type of guide, from a school handbook to a product manual. A clear visual hierarchy helps readers recognize what matters before they read every line.
Step 1: Define The Guide’s Main Job
Before writing, decide what the guide must accomplish. Choose one primary goal: teach, direct, inform, orient, or help readers choose. Then write a one-sentence purpose statement that identifies the audience, the task, and the expected outcome.
For example, a community garden guide might help new members find their plot, understand watering rules, and contact the coordinator. A detailed history of past garden projects may be interesting, but it should not take space away from those immediate needs.
Step 2: Identify The Intended Reader
A guide written for “everyone” often serves no one particularly well. Consider the reader’s age, language, experience level, and reading environment. Will they skim it at a busy event, study it during training, or keep it nearby for regular reference?
Also, account for accessibility. Larger type, clear contrast, familiar vocabulary, and uncomplicated instructions can help a much broader range of readers. The plain-language principles for clear public communication offer a useful reminder to put important information first, use everyday words, and break content into logical sections.
Step 3: Build A Simple Content Map
Do not begin by filling pages with paragraphs. First, list the questions readers are most likely to ask. Group related questions together, place urgent or essential information near the front, and reserve supporting details for later pages.
- Purpose, quick facts, and what readers need before starting
- Main instructions, schedules, rules, or product details
- Examples, diagrams, maps, or short case studies
- A checklist, action plan, and frequently asked questions
- Contact details, additional resources, and next steps
Step 4: Make Every Page Easy To Scan
Readers should understand a page’s structure within seconds. Use descriptive headings, short paragraphs, numbered steps, and bullets for grouped details. Bold key terms sparingly, and leave enough open space around text and images so the page does not feel crowded.
Repeat design patterns throughout the guide. If instructions always use numbered steps and reminders always appear in shaded callouts, readers quickly learn where to look. Avoid walls of text, tiny type, and headings that sound clever but do not explain the section’s purpose.
Step 5: Use Visuals That Add Meaning
Every visual should answer a reader’s question. Use diagrams to show sequence or movement, maps to clarify locations, charts to compare options, and photographs when appearance or setting affects the task. Add captions that explain why the visual matters.
A simple labeled diagram is often more useful than a large decorative image. If a photo does not clarify a process, show an example, or create necessary context, it may be taking valuable space from the information readers actually need.
Step 6: Match The Physical Format To The Job
Format affects usability. A compact guide suits event handouts and welcome packets. A larger page may be necessary for schedules, maps, detailed diagrams, or training exercises. Think about how the guide will be held, stored, mailed, displayed, or written in.
- Event program: Prioritize schedules, locations, and quick-reference sections.
- Training manual: Include step-by-step lessons, examples, and room for notes.
- Product guide: Use short explanations, labeled images, and comparisons.
- School information guide: Use plain language, calendars, contacts, and common questions.
Step 7: Write For Clarity
Use active verbs, familiar terms, and one instruction at a time. Define unfamiliar language when it first appears, replace vague phrases with exact details, and remove repeated points. Reading important instructions aloud is a quick way to find awkward or overly long sentences.
Before: “Users are encouraged to ensure that all required materials have been gathered prior to initiating the registration process.”
After: “Gather your ID, payment card, and registration form before you begin.”
Step 8: Add Reference Features Readers Will Reuse
Small reference tools can turn a guide into something readers keep rather than discard. Consider including a quick-start checklist, glossary, contact list, calendar, notes area, step tracker, or frequently asked questions. QR codes and short links can point to updated details, but essential instructions should remain on the printed page.
Step 9: Review Before Production
- Ask a subject expert to verify facts and terminology.
- Ask a new reader to complete a task using only the guide.
- Check names, dates, addresses, phone numbers, captions, and page references.
- Print a full-size sample and inspect it away from the screen.
- Make sure important content is not too close to a trim edge or fold.
- Complete one final proof after every major edit.
Common Mistakes To Avoid
- Trying to serve too many audiences in one publication
- Choosing colors and fonts before establishing content order
- Reducing type size just to fit more information
- Using too many visual styles, colors, or fonts
- Adding visuals without captions or a clear purpose
- Leaving the next steps and contact information until the end
Frequently Asked Questions
How Long Should A Printed Guide Be?
The right length depends on the reader’s task, not a target page count. A quick event guide may need only a few pages, while training or education materials may require more space. Include what readers need, then remove what does not support the guide’s purpose.
Should A Printed Guide Have A Digital Version?
Usually, yes. A digital version supports remote sharing, search, accessibility, and updates. The printed version remains valuable for hands-on work, classrooms, events, and situations where internet access may be limited.
How Can A Guide Stay Current?
Add a revision date or version number, and review time-sensitive details before every print run. Keep core instructions stable in print while directing readers to a digital update page for changing schedules, policies, or inventory.
Conclusion
A useful printed guide begins with the reader’s needs, not a template. When its purpose is focused, its pages are easy to scan, its visuals clarify the message, and its final version is tested in print, it becomes more than a publication. It becomes a tool people can use, keep, and share.